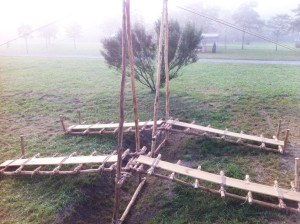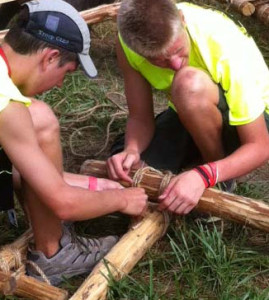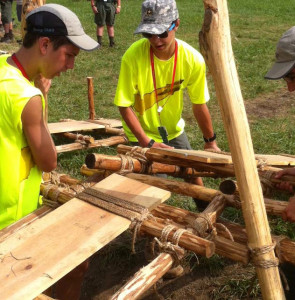
View Video: Single A-Frame Bridges at the Jamboree
Building this bridge is quite simple because there are very few lashings needed for the center A-frame. The A-frame is a triangular shape that resists racking and provides strength for the structure. Here’s what you’ll need:
- two 12-foot x 3-inch A-frame legs
- one 6-foot x 2-inch bottom ledger
- one 6-foot x 3-inch transom
- four 10-foot x 3-inch walkway lateral spars
- twelve 3-foot x 2-inch walkway cross spars
- four 3-1/2-foot x 2-inch walkway cross spars
- two 10-foot x 2-inch walkway planks
- six stakes
- two guylines
A-frame – Start this project by determining the depth of the creek or ravine to be spanned. You have to add 8 feet to that measurement to get the total height of the legs for the A-frame. For example, to span a creek 4 feet deep, the legs of the A-frame should be about 12 feet or longer. This total length allows for the distance from the butt ends of the A-frame legs up to the transom that supports the walkways. The transom should be about 1 foot higher than the banks of the creek. It also allows for the height from the walkways up to the tops of the legs, to permit free passage for a person along the walkways. Lay the A-frame subassembly out on the ground to check if the spars are long enough when lashed together for the two requirements mentioned above.
Walkways – The two 10-foot walkway sections are made as separate subassemblies (refer to walkways).
A-frame Legs – When you’ve determined the length of the spars for the legs of the A-frame, lash them together at the top with a sturdy shear lashing.
Ledger and Transom – To complete the A-frame, use square lashings to lash the bottom ledger across the legs about 1 foot from the bottom of the legs. Then lash a transom spar to support the walkways at the proper height in relation to the banks of the creek.
Add Guylines – Using rolling hitches or roundturns with two half hitches, add a light 1/4-inch guyline to the top of each leg, about 3/4 of the way up. These will prevent the A-frame from tipping over. On each bank, about 20 feet from where the A-frame will be positioned, drive a stake into the ground at a 20º angle.
Assembly – After the walkways and A-frame are made, take them to the assembly site. Place the A-frame in the center of the creek and heel in the legs about 4 to 6 inches deep. As the legs are being heeled in, level the transom to accept the walkways in a level position.
When the A-frame is upright and the transom is level, lash both underspars on the walkways to the transom with strop lashings at three points. Next, lash the cross spars at the ends of the walkways to stakes on the banks of the creek with strop lashings. (A strop lashing is easy to tie. Halve the rope, place the midpoint behind what you’re lashing, wrap both ends around the spars a few times and finish with a square knot.)
As a final measure, attach the guylines to the stakes, driven unto the ground 20 feet away on either side, with rope tackles.


