Bridges are very popular pioneering projects. Essentially, a bridge consists of one or more trestles that support some sort of walkway. In the case of a monkey bridge, the walkway is just a rope that you walk on. But for many other bridges, you can build a walkway from spars that’s easier to walk on than is a monkey bridge.
In the Single Lock, the Single Trestle, and the Single A-Frame Bridge, the same type of walkway can be used. Each walkway can be 10 feet long and consists of two lateral spars and several cross spars. A 10-foot length of 2-inch x 10-inch construction lumber can be added as the plank to walk on.
Making a Walkway
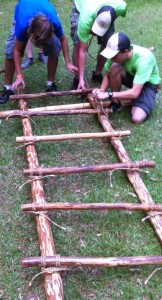 To make a 10-foot section of walkway, select two spars with a butt diameter of 3-1/2 inches. These spars should be matched in the amount of sag they have when you stand on them with the ends supported above the ground. If one spar sags more than the other, it will make the walkway slant from side to side and hard to walk on.
Cross Spars – The cross spars for the walkway should be approximately 2 to 2-1/2 inches in diameter and 3 feet long. You will need two additional cross spars that are 3-1/2 feet long for each walkway section. (The longer spars go at each end of the walkway.) All of the cross spars can be lashed to the lateral spars with 1/4-inch manila. Since the lashing is made only to hold the cross spars in position and not support weight, you can use a double strand of binder twine. If you use binder twine, double it over and twist it a few times before you start the lashing. Make sure you have enough to complete the full lashing with the doubled-over binder twine. Don’t finish the lashing with only one strand if you run short. Instead, tie on more binder twine to complete the lashing. Each of the cross spars is lashed to the lateral spars with a square lashing, making three wraps and two fraps.
There are two ways to approach lashing on the cross spars. If you are going to add a plank over the top of the cross spars, you will need a total of eight cross spars for each walkway. That is, six 3-foot long cross spars, and two 3-1/2-foot long cross spars.
Start by lashing one of the 3-1/2-foot long cross spars about 6 inches from the butt end of the lateral spars. Place this spar on top of the lateral spars so that the ends of the cross spar extend 3 to 4 inches out over both sides of the lateral spars. This additional length hanging out is used to lash the cross spar to the stakes, which anchors the ends of the walkway in place.
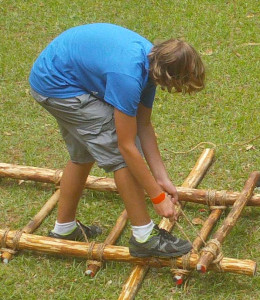
After the first cross spar is lashed in place, add six more 3-foot cross spars every 16 to 18 inches down the length of the lateral spars. The last cross spar should be lashed about 12 inches from the ends of the lateral spars to allow room for the “underspar.”
Underspar – An important feature of this type of walkway is to lash one 3-1/2-foot cross spar to the underside of the lateral spars, 6 inches from the end. When the two walkway sections are placed on the trestle(s) to form the bridge, these under spars should contact the transom of the trestle(s). Then the three spars [two underspars on the two walkways and the transom spar of the trestle(s)] are lashed together at three points using a strop lashing. (A strop lashing is easy to tie. Halve the rope, place the midpoint behind what you’re lashing, wrap both ends around the spars a few times and finish with a square knot.)
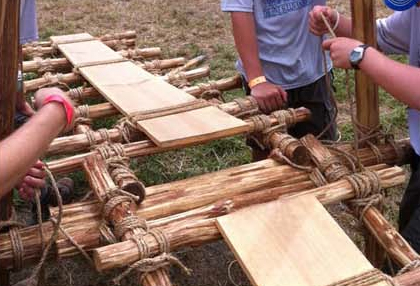
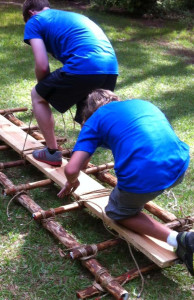 Walkway Plank – Before lashing the walkway to the trestle, the walkway plank should be lashed in at least three places with square lashings. If you are going to walk directly on the cross spars (with no plank on top), you will need enough cross spars to make a safe walkway, one that your foot cannot slip through. Start making the walkway as described before by lashing a 3-1/2-foot cross spar at the butt end of the lateral spars. Then lash the 3-foot cross spars about 3 inches apart, using as many cross spars as necessary to go the entire length of the walkway, ending about 1 foot from the other end. Finally, add the 3-1/2-foot long underspar.
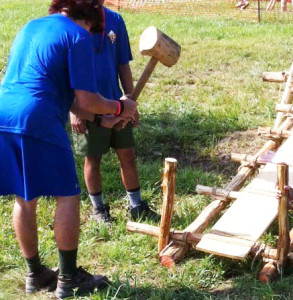 Anchoring the Walkway – After the walkway is assembled, the butt ends are placed on the bank of the creek or ravine. This end is anchored in place by driving stakes in the outside corners formed by the lateral spars and the first (3-1/2-foot) cross spar. Lash this cross spar of the walkway to the stakes with a strop lashing. When the walkways are lashed to the stakes and to the trestle(s), all the walkway sections become joined to form a single unit that is very strong. While the above text describes how to make 10-foot walkways, you can make 8 or 12-foot sections the same way. If you use the longer walkways, be sure to test the strength of the lateral spars before lashing them into a walkway that could be unsafe.